[Project] Proxmox Hypervisor for Homelab
Simplified Tutorial: Proxmox VE Installation
What is Proxmox
Proxmox is an open-source virtualization management platform that combines two virtualization technologies: - KVM for full virtualization
- LXC for container-based virtualization.
It provides a web-based interface for managing virtual machines (VMs), containers, and storage resources.
You can have features like live migration, backups, and clustering out-of-the-box.
It suitable for both enterprise and homelab environments. The platform is backed by a robust community.
Use Cases
Proxmox is like a playground for tech fans, mixing KVM and LXC into a user-friendly web interface. You can test things, deploy VMs in a blink of an eye, improve your home network, and, of course, self-host almost everything!
My Hardware
In the quest for an efficient and versatile homelab setup, the Beelink EQ12 Pro emerged as a promising candidate. Powered by an Intel Core i3 N-305 CPU from the Alder Lake-N series, this mini PC packs eight E-cores.
I found this mini pc used in France for $170, a pretty good deal. I enhanced its by adding 32GB of DDR5 RAM for $65.
Pros
- 2 x 2.5GbE LAN ports (Intel i225-V B3)
- Moderate power usage: ranges from 9 to 36W
Cons
- PCIe : NVMe SSD operates on a PCIe Gen3 x1 link, limiting maximum data throughput ~ 750Mb/s for nvme :( .
- Memory : Supports only 16 GB single-channel memory, though I have successfully used 32GB without encountering any issues for the moment.
- The casing feels cheap and really plastic-ish.
Other
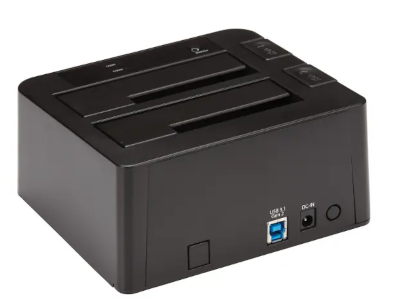
I also have this type of HDD dock for adding more 3.5-inch storage. I can’t really recommend it, but hey, it works.
I replaced the Wi-Fi card, which I no longer use because I only use Ethernet, with a secondary NVMe drive. ou can see how I did that at the end of the installation, at the bottom of this chapter :
Prerequisites
- Proxmox VE installer ISO image
- USB drive or CD-ROM for installation
- Compatible server (64-bit Debian Linux)
To make a USB bootable drive, you can use rufus or balena etcher for example, the iso can be downloaded here : https://www.proxmox.com/en/downloads/proxmox-virtual-environment/iso
Installation Steps
Setting up the bios
Before or after installing proxmox, you have to modifify some bios options, to make virtualization better and activating all functionnality provided by the bios
1. Preparation
- Insert the prepared installation media (USB or CD-ROM) into the server.
- Ensure booting from this media is enabled in the server’s firmware settings.
2. Start the Installer
- Boot from the installation media.
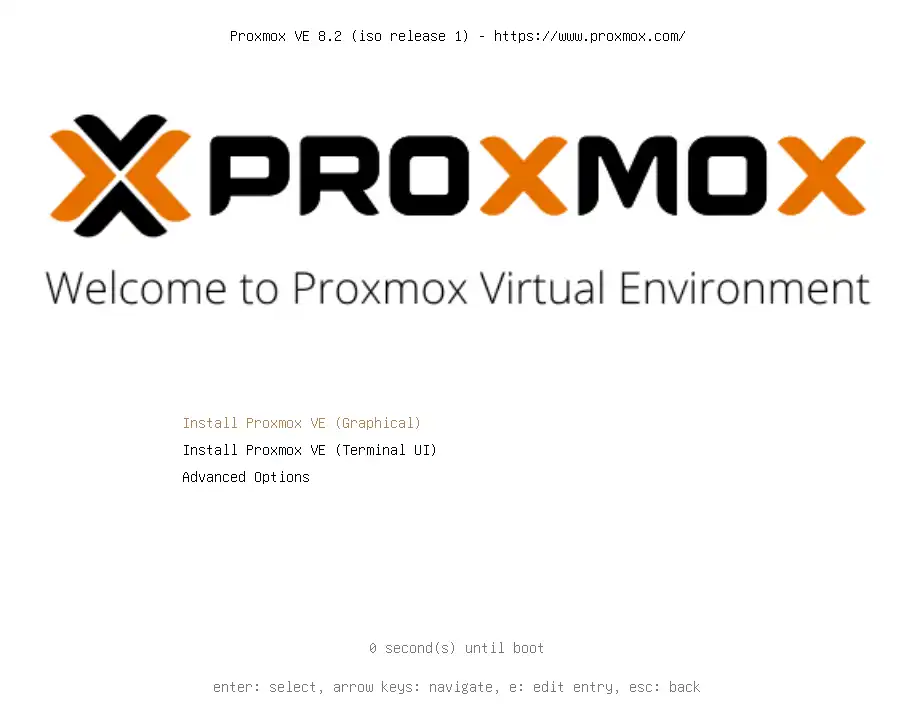
Choose the
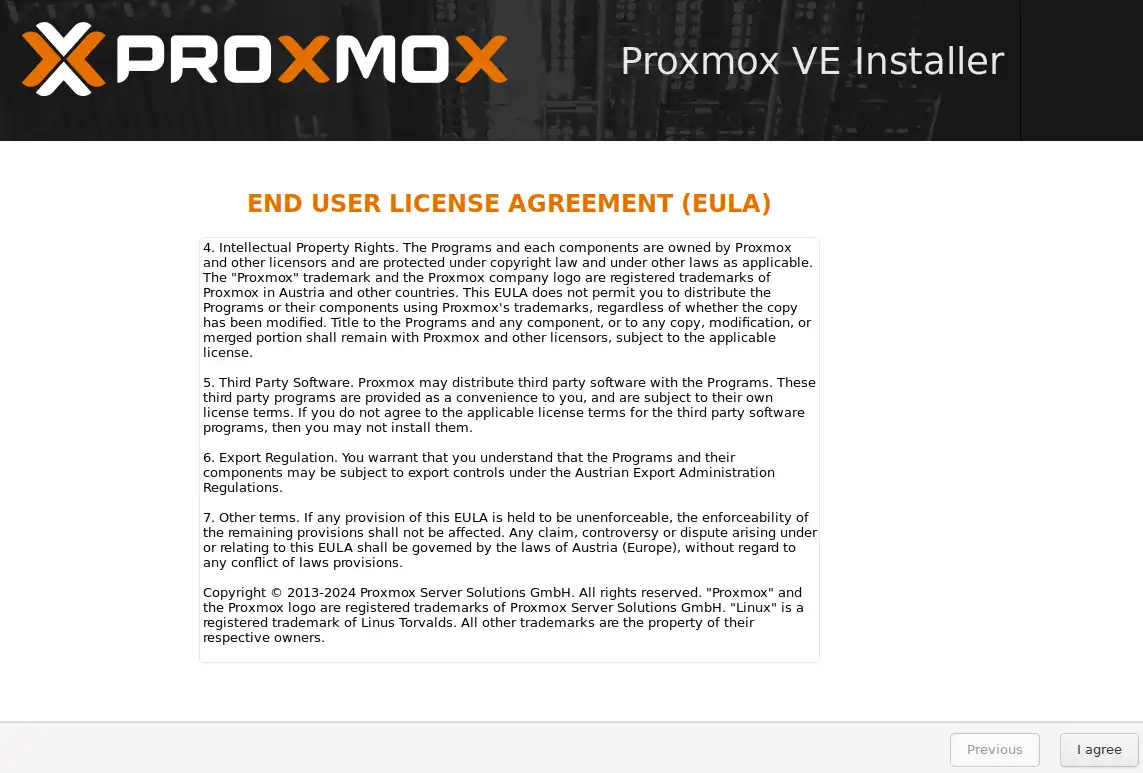
Install Proxmox VE (Graphical)option for a graphical installation or one of the other options if necessary.Read and accept the EULA (End User License Agreement).
3. Select Target Disk
Select the target hard disk(s) for the installation, keeping in mind that all existing data will be erased
- hdsize: Set the total hard disk size to use.
- swapsize: Set the swap partition size.
- maxroot: Set the maximum size of the root partition.
- maxvz: Set the maximum size of the data partition.
minfree: Set the free space to leave in the LVM volume group.
- You have the option to customize the default partition sizes
- If you have the necessary hardware and knowledge, configuring ZFS for Proxmox can be recommended
Personally, I prefer running Proxmox on a single SSD and configuring ZFS separately for my VMs on this mini PC. Given that the hardware isn’t as robust as a server (no raid controller, RAM without ECC, limited number of drives) There is zero redundancy in my ZFS pool, I use it only to enhance storage speed with 2 nvme disks in RAID 0. I keep backups of my VMs on separate storage unrelated of my ZFS pool in case of corruption or instability.

- Select basic configuration options such as location, time zone, and keyboard layout.
- Set the superuser (root) password and an email address to receive system notifications.

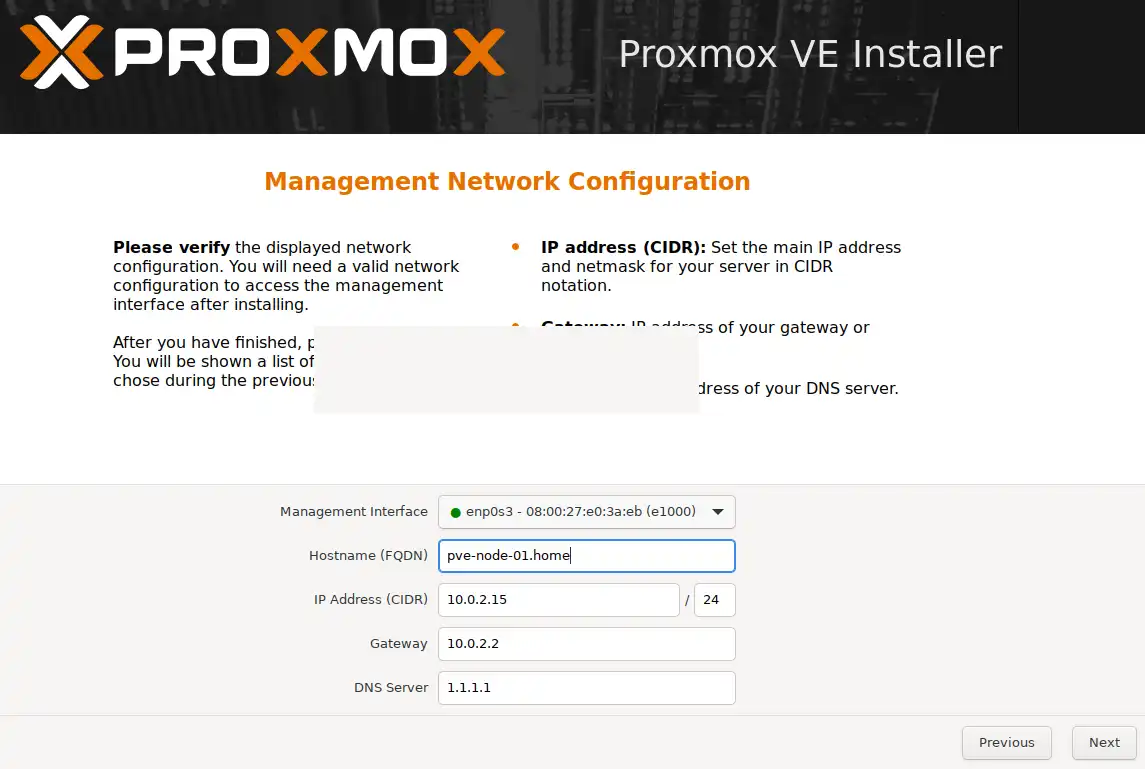
4. Network Configuration
Configure the available network interfaces. You can specify either an IPv4 or IPv6 address.
Choose a static IP address that is not already in use. You can assign this IP by configuring your DHCP server and also by setting it in the network/interface file on the Linux host.
The management interface will be used to connect to the Web GUI, so choose it carefully. Here, you can also set up a more advanced configuration to manage your proxmox node only from a specific VLAN.
The hostname of your Proxmox node cannot be easily changed after installation, so select it carefully. Technically, it can be changed, but it requires removing all your existing VMs.
In this example, I am using Google DNS, but you can use the DNS of your router, ISP, or Google. You can also follow another tutorial to set up your own DNS resolver or forwarder, such as Pi-hole or a pfSense router.
5. Summary and Installation
- Review the selected settings in the summary and make changes if necessary.
- Click
Installto begin the installation. Wait for the package copying to complete.
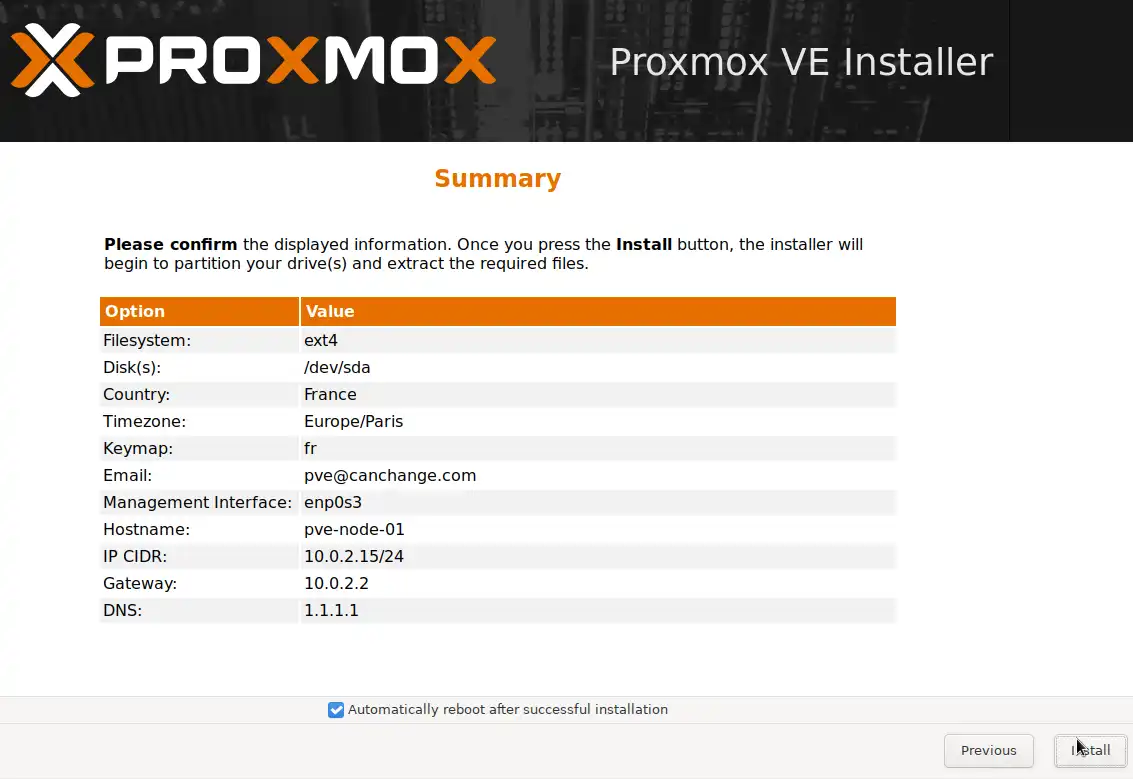
- Once the installation is complete, remove the installation media and reboot the system.
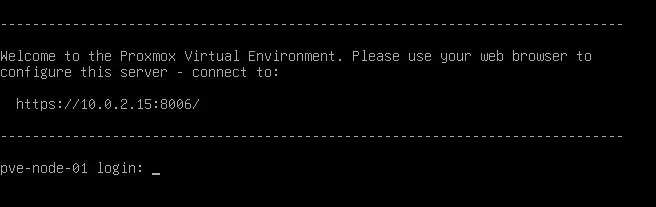
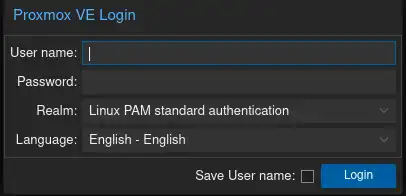
- After rebooting, access the Proxmox VE web interface via the IP address defined during installation, e.g.,
https://youripaddress:8006. - Log in with the username root and the password set earlier.
6. Congratulations
You can now connect to your newly created proxmox node ! :)

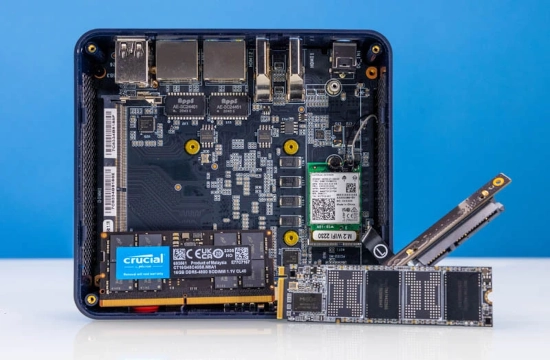
Adding NVME Drives
As we seen previously, this mini pc have :
- 1x sata 2.5 inches port
- 1x Nvme 2280 port
- and…. A 1x Wifi card in 2230 format
The nvme port is a PCI 3.0 x1 lane which, suck, only 800 MB/s on average in read/write, while this nvme drive can do ~ 1500 MB/s easily, the drive is highly bottlenecked by this pci lane
well,well,well this wifi card slot can be transformed and use as a storage, It’s also a x1 pci 3.0 lane The goal is to have two nvme drive that can be used in stripped mode also called raid0 to improve storage speed.
To do this, you need to purchase an “M2 A/E” key to “M2 M” key adapter. Given the limited space in these tiny PCs, you’ll need to break the PCB at the 2230 size limit.
It won’t be easy, but I assure you, it will work!
These adapters cost only $5, and a 512 GB NVMe drive in 2230 format is around $30. 
Here’s how to install the adapter: 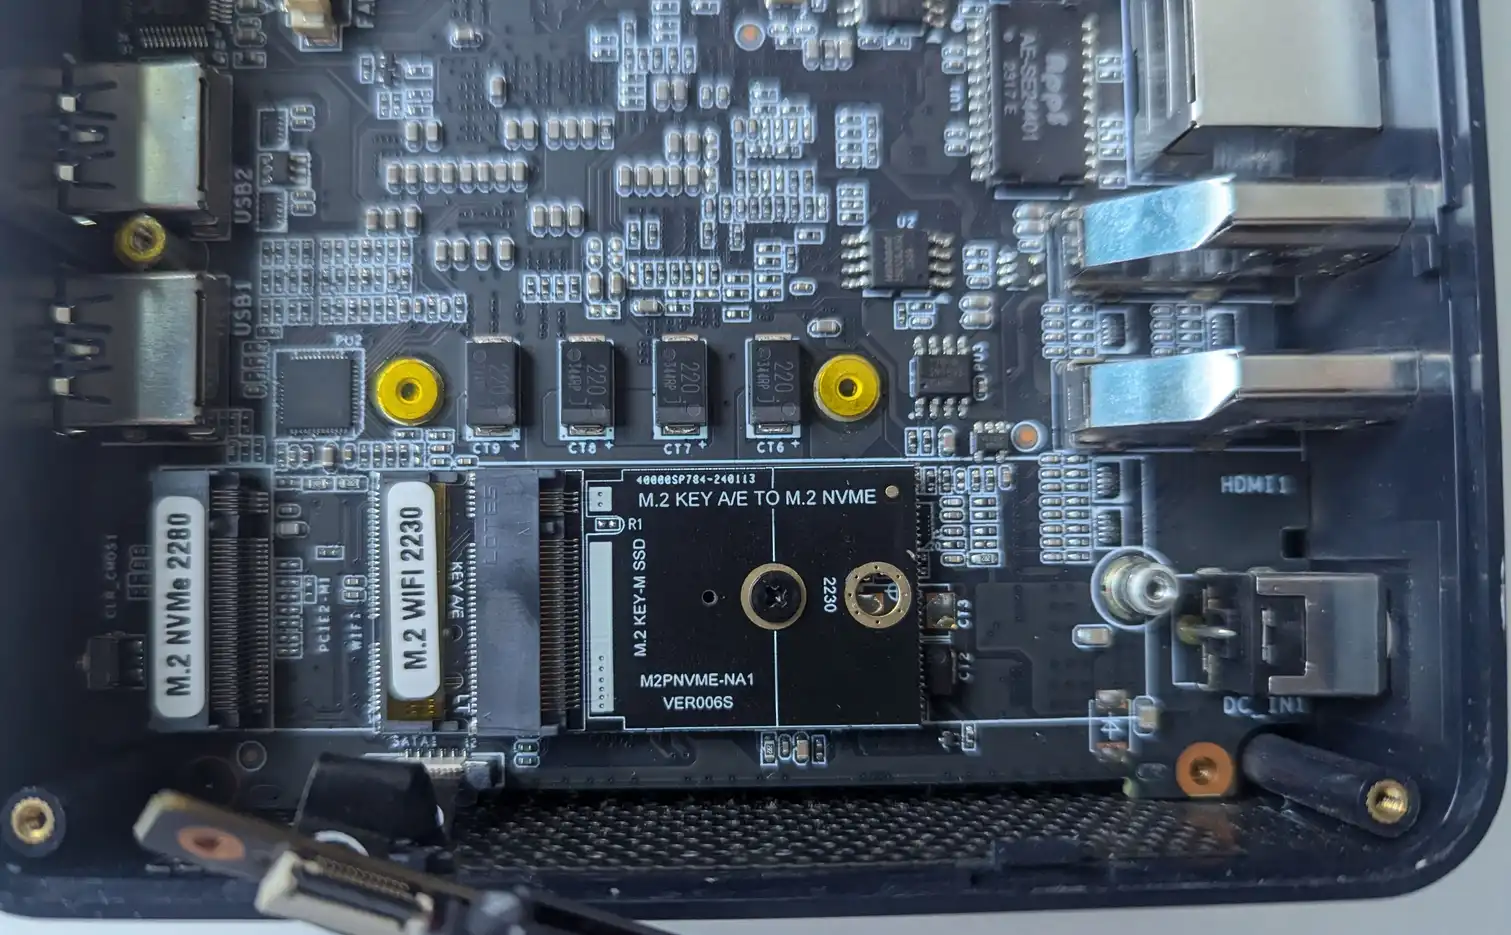
The drive is held using an elastic strap, which was shipped with an nvme heatsink. Although the adapter comes with a screw, it didn’t allow the drive to fit properly in my case, so I used the elastic strap instead.
I also had to help the thermal sto prevent the drive from constantly throttling due to high temperatures. For this, you can add a heat sink like this. 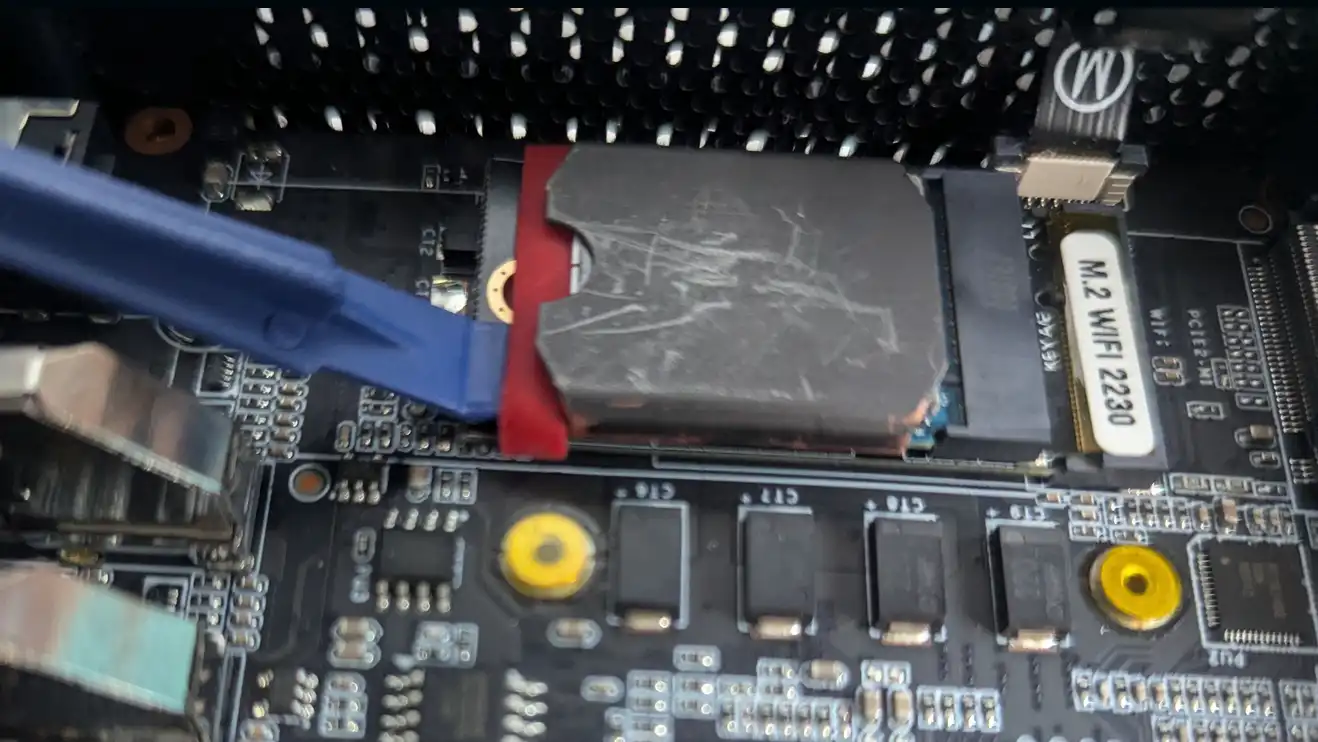
Space constraints are a significant issue here. The copper thermal covering was not helpful at all.
To improve temperatures, I added a thin thermal pad on top of the copper covering. After closing the case, I added another thin thermal pad on top of the 2280 NVMe drive.
As you can see, this is not an optimal solution, The 2280 nvme is severly bended and hopefully the elastic strap on the 2230 NVMe drive prevent direct contact with the PCB underneath. However, in my case everything work flawelssly, I never go over 67°c on the nvme 2230 and 64 °c on the nvme 2280 after a disks stress test.
A little bit scary for the first start ;/
ZFS Storage in a RAID 0 pool
apt-get install zfsutils zfs-initramfs systemctl status zfs-import-cache.service
| systemctl list-units | grep zfs |
Pool creation
1
2
3
zpool create yourpoolname /dev/sdX /dev/sdY
#in my case :
zpool create ZFS_NVME_ARRAY /dev/nvme1n1 /dev/nvme0n1
verify the pool has been created :
1
zpool status
What is a pool ?
- Manages the physical storage devices
- Define the configuration and redundancy (e.g., RAID-Z, mirroring, etc.) of the underlying disks
Dataset creation
let’s create a dataset on this pool :
1
2
3
zfs create yourpoolname/datasetname
#in my case :
zfs create ZFS_NVME_ARRAY/vmdata
What is a dataset ?
- File systems or block storage devices created within the pool
- Inherit many properties (e.g., compression, quotas) from the pool but can also have their own custom properties
- Hierarchical storage structures inside the pool
Setting ARC parameter
ARC is an acronym for Adaptive Replacement Cache, an algorithm for caching data in DRAM. ZFS is known to use a good amount of RAM as cache, we can limit by tuning conf files.
more infos on my ZFS cheatsheet
dmesg | grep zfs zfs create tank/vmdata zfs create ZFS_NVME_ARRAY/vmdata zfs list
vim /etc/modprobe.d/zfs.conf
cat /etc/modprobe.d/zfs.conf options zfs zfs_arc_max=4294967296
This tutorial covers the basic steps to install and configure Proxmox VE. For more detailed installation and configuration, please consult the official documentation.